Easy How To Patch A Drywall Hole + Tips
The process of repairing damage to gypsum board, often referred to as drywall, involves mending apertures to restore a smooth, seamless surface. Successful drywall repair prevents further structural degradation and enhances aesthetic appeal. A common instance of this is rectifying an opening created during plumbing or electrical work.
Correcting imperfections in wall surfaces is vital for maintaining a building's structural integrity and preventing moisture intrusion, which can lead to mold growth. This activity has evolved from older methods involving plaster and lath to utilizing modern, easily workable materials, significantly simplifying the repair process for homeowners and professionals alike. Proper repair increases property value and creates a more comfortable living environment.
The following information will outline the standard materials and techniques required for effectively filling voids in gypsum wallboard. Several methods exist, depending on the size and nature of the damage. The subsequent sections will detail approaches for handling both small and large perforations, ensuring a professional and lasting result.
- Absolute Martian Manhunter
- Craigslist Usa Austin
- Alaska Boats And Permits
- Ace Hardware Modesto
- Birrieria El Patron
Frequently Asked Questions
The following questions address common concerns regarding the process of mending apertures in gypsum board. These answers aim to provide clarity and guidance on achieving effective and lasting repairs.
Question 1: What materials are essential for a basic gypsum board repair?
Essential materials include a utility knife, joint compound (also known as drywall mud), a drywall knife (various sizes), sandpaper or a sanding sponge, and potentially a piece of replacement gypsum board or a patch kit, depending on the hole's size.
- Louis Litt Actor
- Prestige Imports Miami
- Dmv Tupelo Ms
- University Of Florida Womens Soccer
- Dog Rose Brewing
Question 2: How does one properly prepare the area surrounding a hole before patching?
Preparation involves removing any loose or crumbling gypsum board around the perimeter of the hole. It is necessary to create a clean, stable surface for the patching material to adhere to. The immediate area should be free of dust and debris.
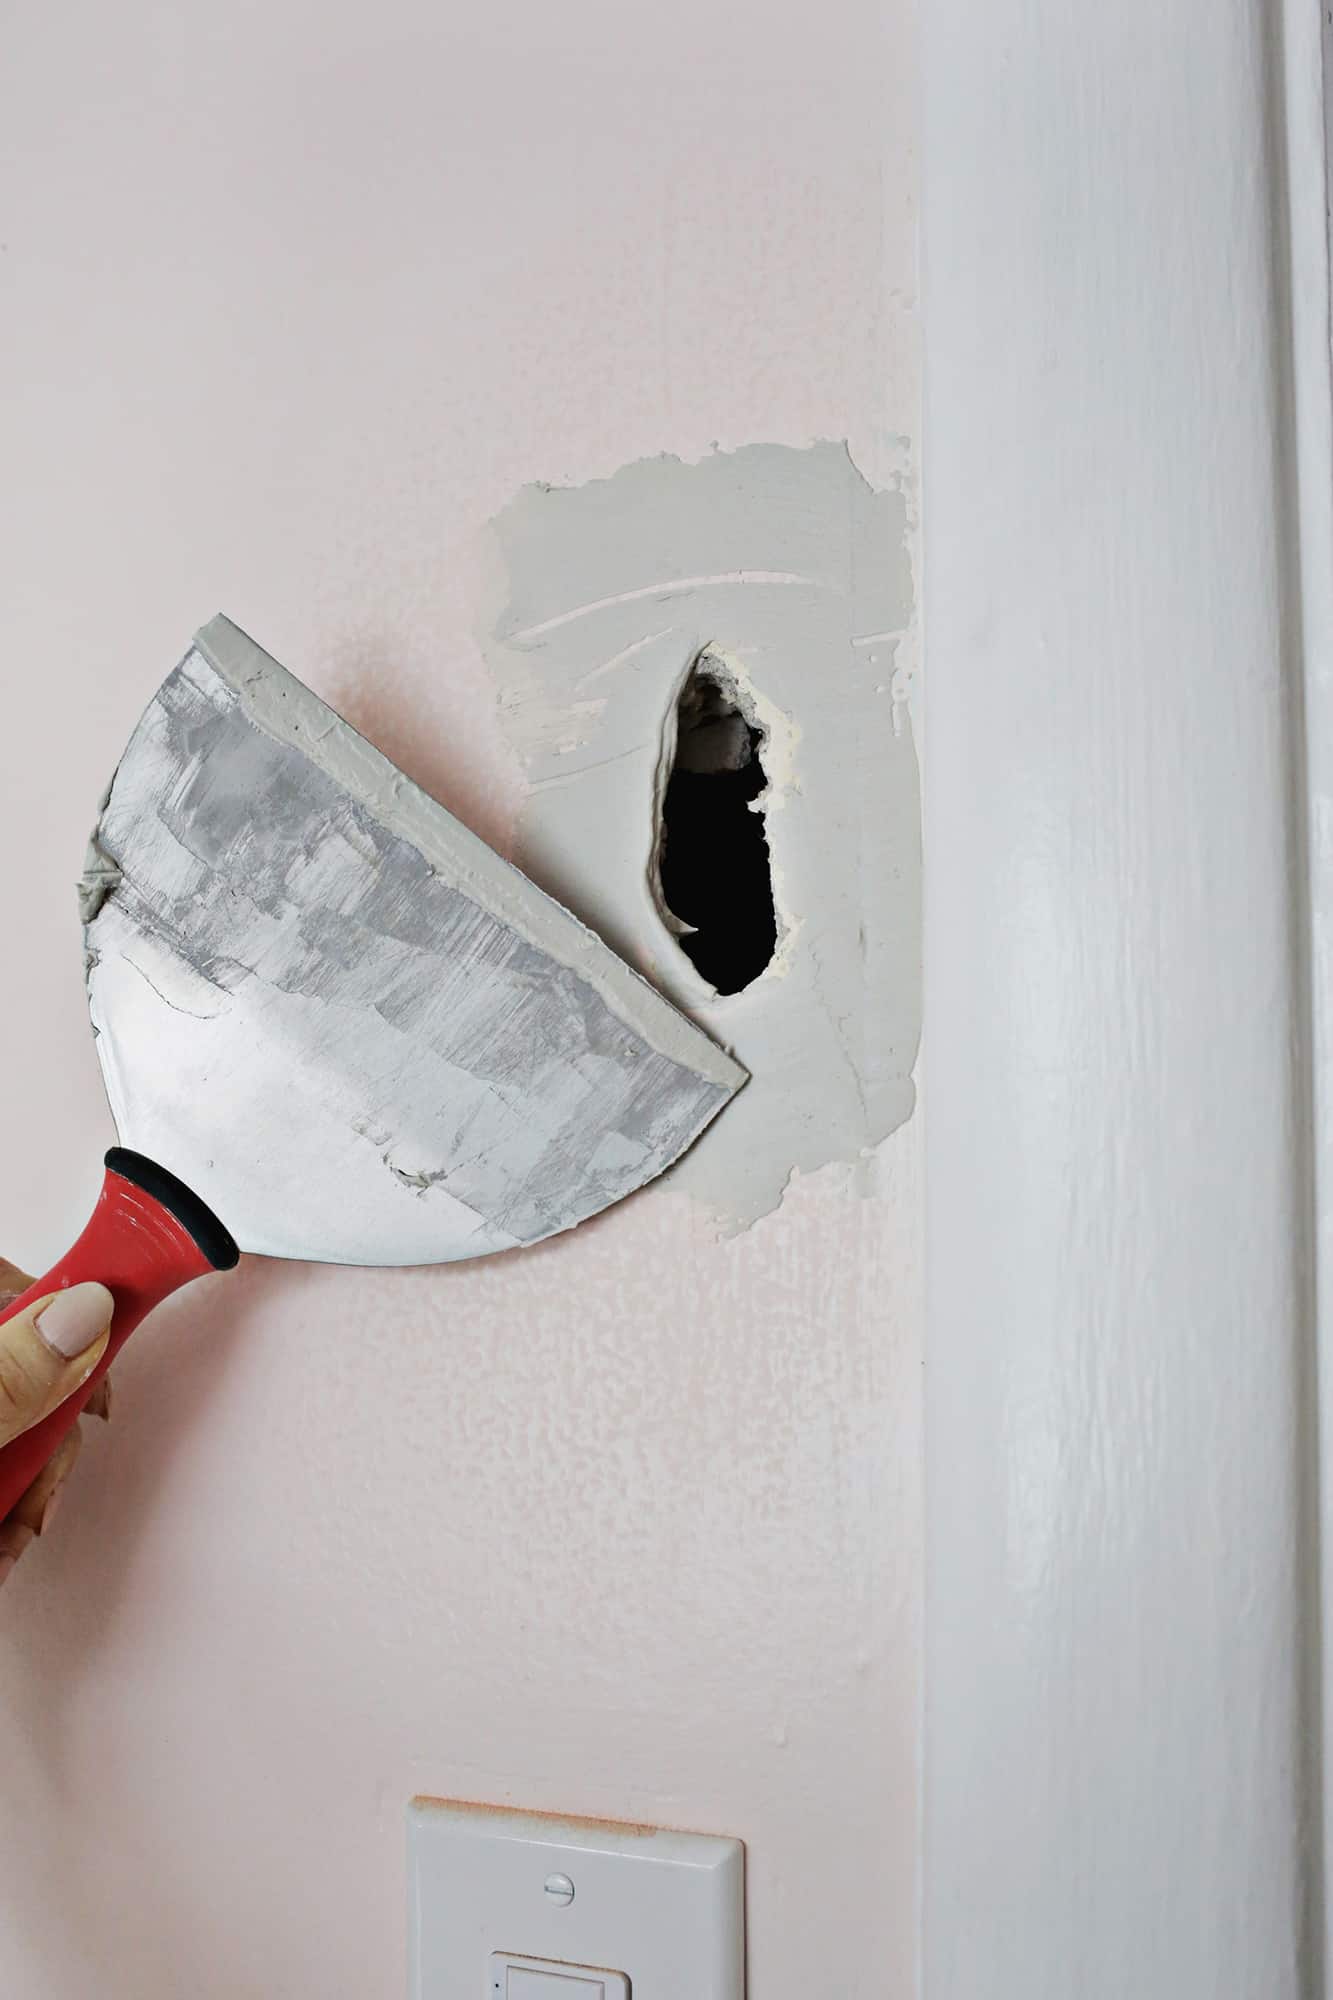
Question 3: What is the correct method for applying joint compound to a small hole or crack?
Joint compound should be applied in thin, even layers, using a drywall knife. Each layer should be allowed to dry completely before applying the next. Multiple thin coats are preferable to one thick coat to minimize shrinkage and cracking.
Question 4: How is a large aperture in gypsum board best addressed?
For large apertures, a backing structure, such as a piece of wood or metal, should be secured behind the opening. A replacement piece of gypsum board is then cut to size and screwed or nailed to the backing. Joint compound is used to blend the edges of the new board with the existing wall.
Question 5: What sanding techniques are recommended for achieving a smooth, seamless finish?
Sanding should be performed gently and evenly, using fine-grit sandpaper or a sanding sponge. Avoid excessive pressure, which can damage the surrounding surface. The goal is to feather the edges of the patch to blend seamlessly with the existing wall texture.
Question 6: How can one prevent cracks from reappearing in patched gypsum board?
To prevent cracks, ensure that the underlying structure is stable and that the patch is properly supported. Using fiber tape or mesh tape over the seams can also help to reinforce the patch and prevent future cracking. Priming and painting the repaired area also helps to seal and protect the surface.
Proper preparation, careful application of materials, and attention to detail are crucial for achieving a successful and durable repair. These steps will ensure the patched area blends seamlessly with the existing wall surface.
The subsequent section will provide a detailed, step-by-step guide to performing both small and large gypsum board repairs, encompassing all the aforementioned techniques.
Expert Guidance on Gypsum Board Repair
Effective techniques for patching apertures in gypsum board require careful execution and attention to detail. The following tips provide guidance for achieving professional-quality results.
Tip 1: Proper Surface Preparation: Before applying any patching compound, ensure the area around the hole is clean and stable. Remove any loose debris or crumbling gypsum board. This will provide a sound surface for adhesion.
Tip 2: Utilize Mesh or Paper Tape: For larger holes, apply fiberglass mesh tape or paper tape over the seams where the patch meets the existing wall. This reinforces the repair and prevents cracking as the compound dries.
Tip 3: Apply Thin Coats of Compound: Multiple thin coats of joint compound are preferable to a single thick coat. Allow each layer to dry completely before applying the next. This minimizes shrinkage and reduces the likelihood of cracking.
Tip 4: Feather Edges for Seamless Blending: When applying the joint compound, feather the edges of the patch to blend seamlessly with the surrounding wall. This involves gradually reducing the thickness of the compound towards the edges.
Tip 5: Choose the Correct Joint Compound: Different types of joint compound are available for specific purposes. Consider using a setting-type compound for the initial coat, as it hardens quickly and resists shrinking. Use a topping compound for the final coat, as it sands easily.
Tip 6: Sand Carefully to Avoid Damage: When sanding the dried compound, use a fine-grit sandpaper or sanding sponge. Apply gentle pressure to avoid damaging the surrounding wall surface. A light touch is essential for achieving a smooth finish.
Tip 7: Prime Before Painting: Before painting the repaired area, apply a coat of primer. This helps to seal the surface and provides a uniform base for the paint, ensuring proper adhesion and a consistent color.
Consistent application of these methods, combined with a measured approach, increases the likelihood of a repair that is both aesthetically pleasing and structurally sound.
The final section of this document will offer an in-depth analysis of common errors encountered during gypsum board repair, highlighting strategies to prevent these pitfalls.
Concluding Remarks on Gypsum Board Aperture Repair
This exploration of how to patch a hole in drywall has outlined essential techniques for restoring damaged gypsum board. Attention to detail during each stage, from initial preparation to final finishing, is critical. Achieving a seamless repair necessitates a clear understanding of materials and methods, ensuring a durable and aesthetically consistent outcome.
Mastery of these techniques elevates the standard of interior maintenance and contributes to the long-term preservation of property value. Continued diligence in the application of these methods will yield proficient results, demonstrating a commitment to quality craftsmanship and structural integrity.
- Host Of Top Chef
- Spike Lee Joint
- Dmv Tupelo Ms
- Vanessa Bryant Net Worth
- Christopher Masterson Movies And Tv Shows
:max_bytes(150000):strip_icc()/repair-a-large-hole-in-drywall-1824831_03_install_patch_1545-68477076e16b4775b65d51fe92b17122.jpg)
How to Patch a Large Hole in Drywall
Easy Hack To Patch A Drywall Hole A Beautiful Mess

Drywall Repair How to Patch a Hole in the Wall (DIY)

